Making a Clerk’s Cap
1. Introduction
A few years ago I came across a website by the name of the Northwest Journal while perusing the internet. This site contained numerous articles covering the Canadian fur trade which played a vital role in Canada's early history. What caught my eye the most was an article detailing the construction of a clerk's cap: a soft, billed cap given to clerks working for fur trade companies from around 1800 to the 1850s.
Since sewing and garment construction has been an interest of mine for quite a while, I decided to give it a shot and make one for myself. Here I've documented my experience reproducing this little piece of Canadian history.
2. Materials
First, let’s start with listing the materials I chose to construct the hat out of.
- Main fabric: brown 9 wale cotton corduroy.
- Lining: mystery fabric with a floral pattern.
- Interfacing: cotton canvas.
- Bill stiffener: buckram.
The choice of main fabric and the bill stiffener were both recommendations found in the original article. Nothing particularly special with the choice, you can view these as me sticking with the defaults.
My lining fabric was some old fabric I found on the family farm. Don't really know much about it other than it having a pretty floral pattern on it.
For interfacing I used some cotton canvas which I have a lot of. A while back I decided to purchase 7 yards of it for a currently on hiatus sewing project of mine. In all honesty, it was far too much fabric for what I needed as I didn’t account for just how wide the fabric was.
As you may have surmised already, I chose this as my interfacing simply because I have surplus of it available. The only downside of this choice is that the cap turned out much stiffer than what the article describes. It describes a cap that’s able to be bagged in different ways to make it look like everything from a Greek fisherman’s hat to a flat cap. My hat on the other hand pretty much just sticks to one shape.
3. Marking out the pattern
My marking out of the pieces of the hat on my fabric deviated slightly from the instructions given. All the given measurements included a ⅜″ seam allowance which I excluded from what I drew out. For example, the instructions called for a 10 ½″ diameter circle to be drawn, I instead drew a 9 ¾″ diameter circle on the fabric. The primary reason I did this was because I was going to be hand sewing the cap. When hand sewing it is far more convenient to have the seam lines drawn out so you can follow them while sewing. The modern practice of patterns having the edges of the seam allowances drawn out to be followed when cutting came about because of sewing machines.
3.1. The sides
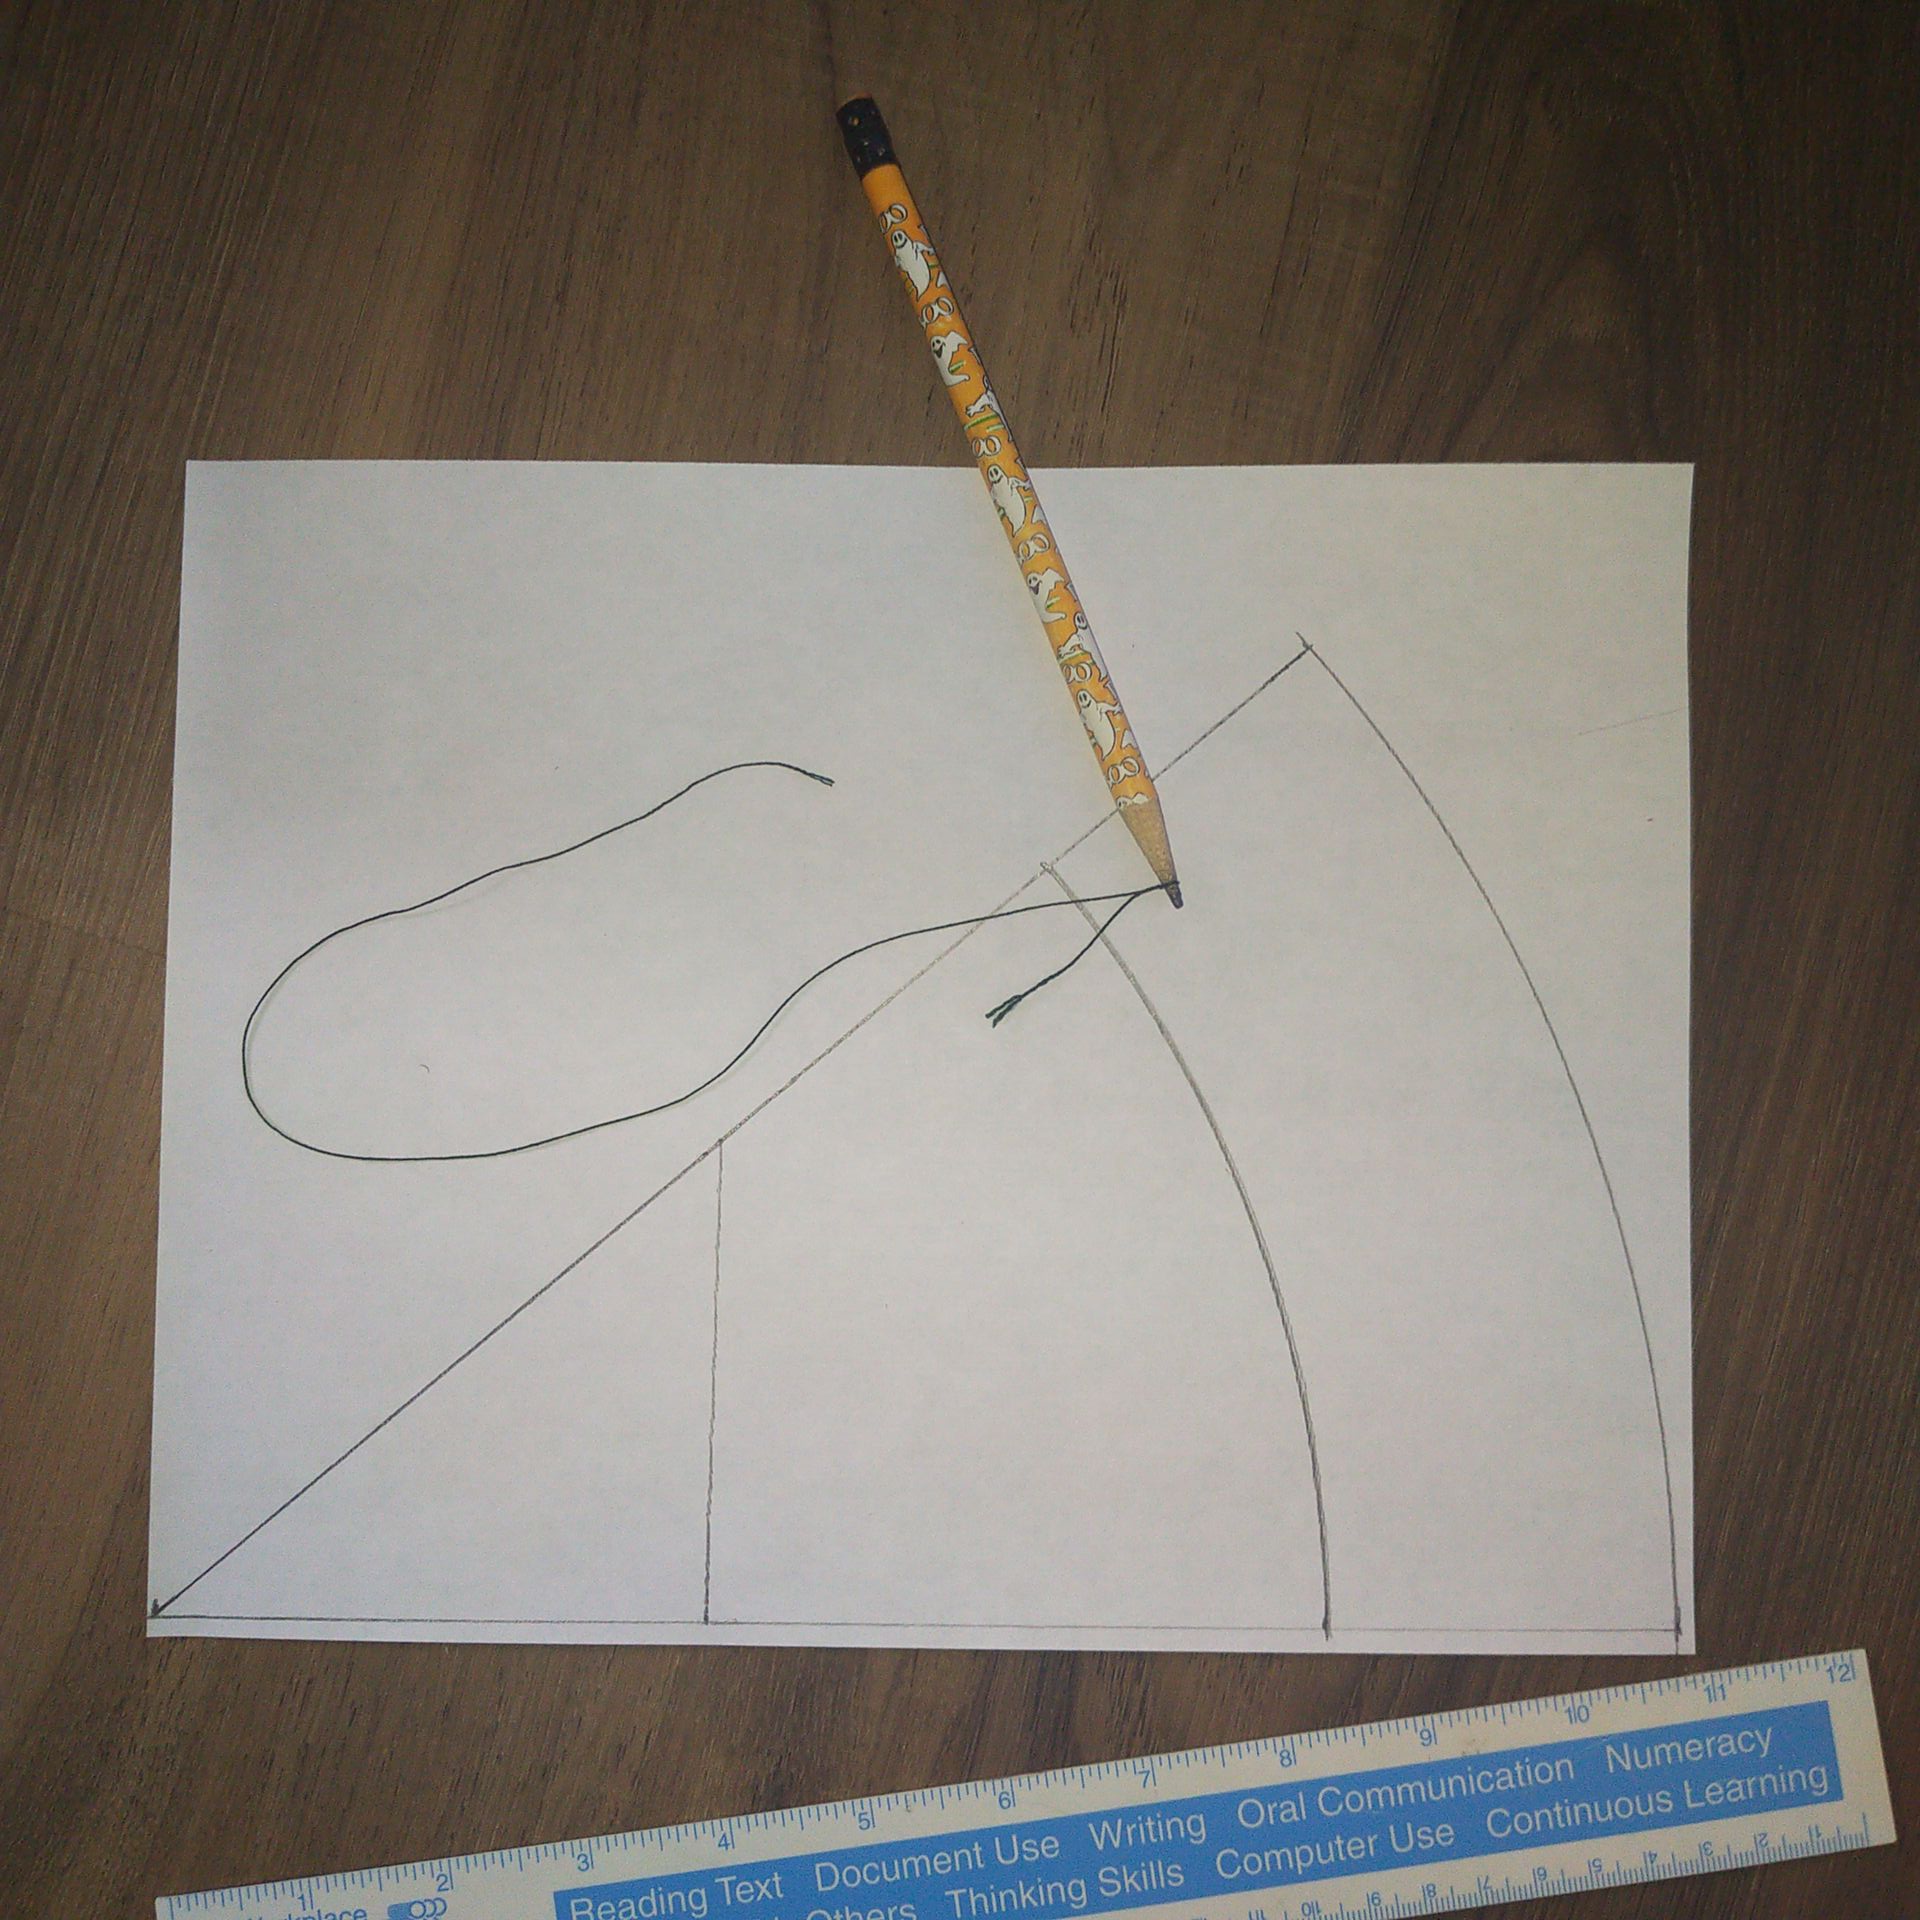
Marking out the sides of the cap was the trickiest part of drawing out the pattern. You effectively need to end up with a piece of an inverted cone when the four side pieces are sewn together. To accomplish this you are instructed to use a compass and protractor to draw out an arc of radius R for an angle X, the values of R and X are given for the different hat sizes. Unfortunately I had neither a compass nor protractor on hand so I had to make due without.
In substitution of a compass I made use of a pencil with a bit of string tied to it, this was also what I used to draw out the circle for the crown of the cap. Drawing out the correct angle involved a bit of trigonometry to determine appropriate lengths of the right angled sides of a right triangle that would give me my angle X.
3.2. The search for a bill
The only other issue I ran into was the lack of a bill pattern. The article mentions that the bill pattern was printed on page 40, but it’s sadly missing from the online content (the Northwest Journal was originally published in a magazine-format). As such I had to scrounge the internet for a suitable bill pattern.
The first pattern I found ended up being a bit too small, something I sadly discovered only after completing the cap and wearing it for a few days. The bill would put pressure on my temples which made the hat uncomfortable to wear after a while. Fortunately it’s nothing a seam ripper, a new bill pattern, and a bit more sewing can’t fix.
After a bit more searching, the bill pattern I settled for was one I extracted from a cycling cap pattern I found. More specifically it was the large brim pattern piece from the Dill Pickle Cycling Cap. This bill pattern worked quite nicely and I can recommend it for anyone else who may want to try their hand and making their own clerk’s cap.
4. Construction
Below outlines the steps I followed to construct my Clerk’s cap with accompanying photographs. You may notice that some steps are missing an accompanying photo, that’s simply because I forgot to stop and take one as I was putting the hat together.
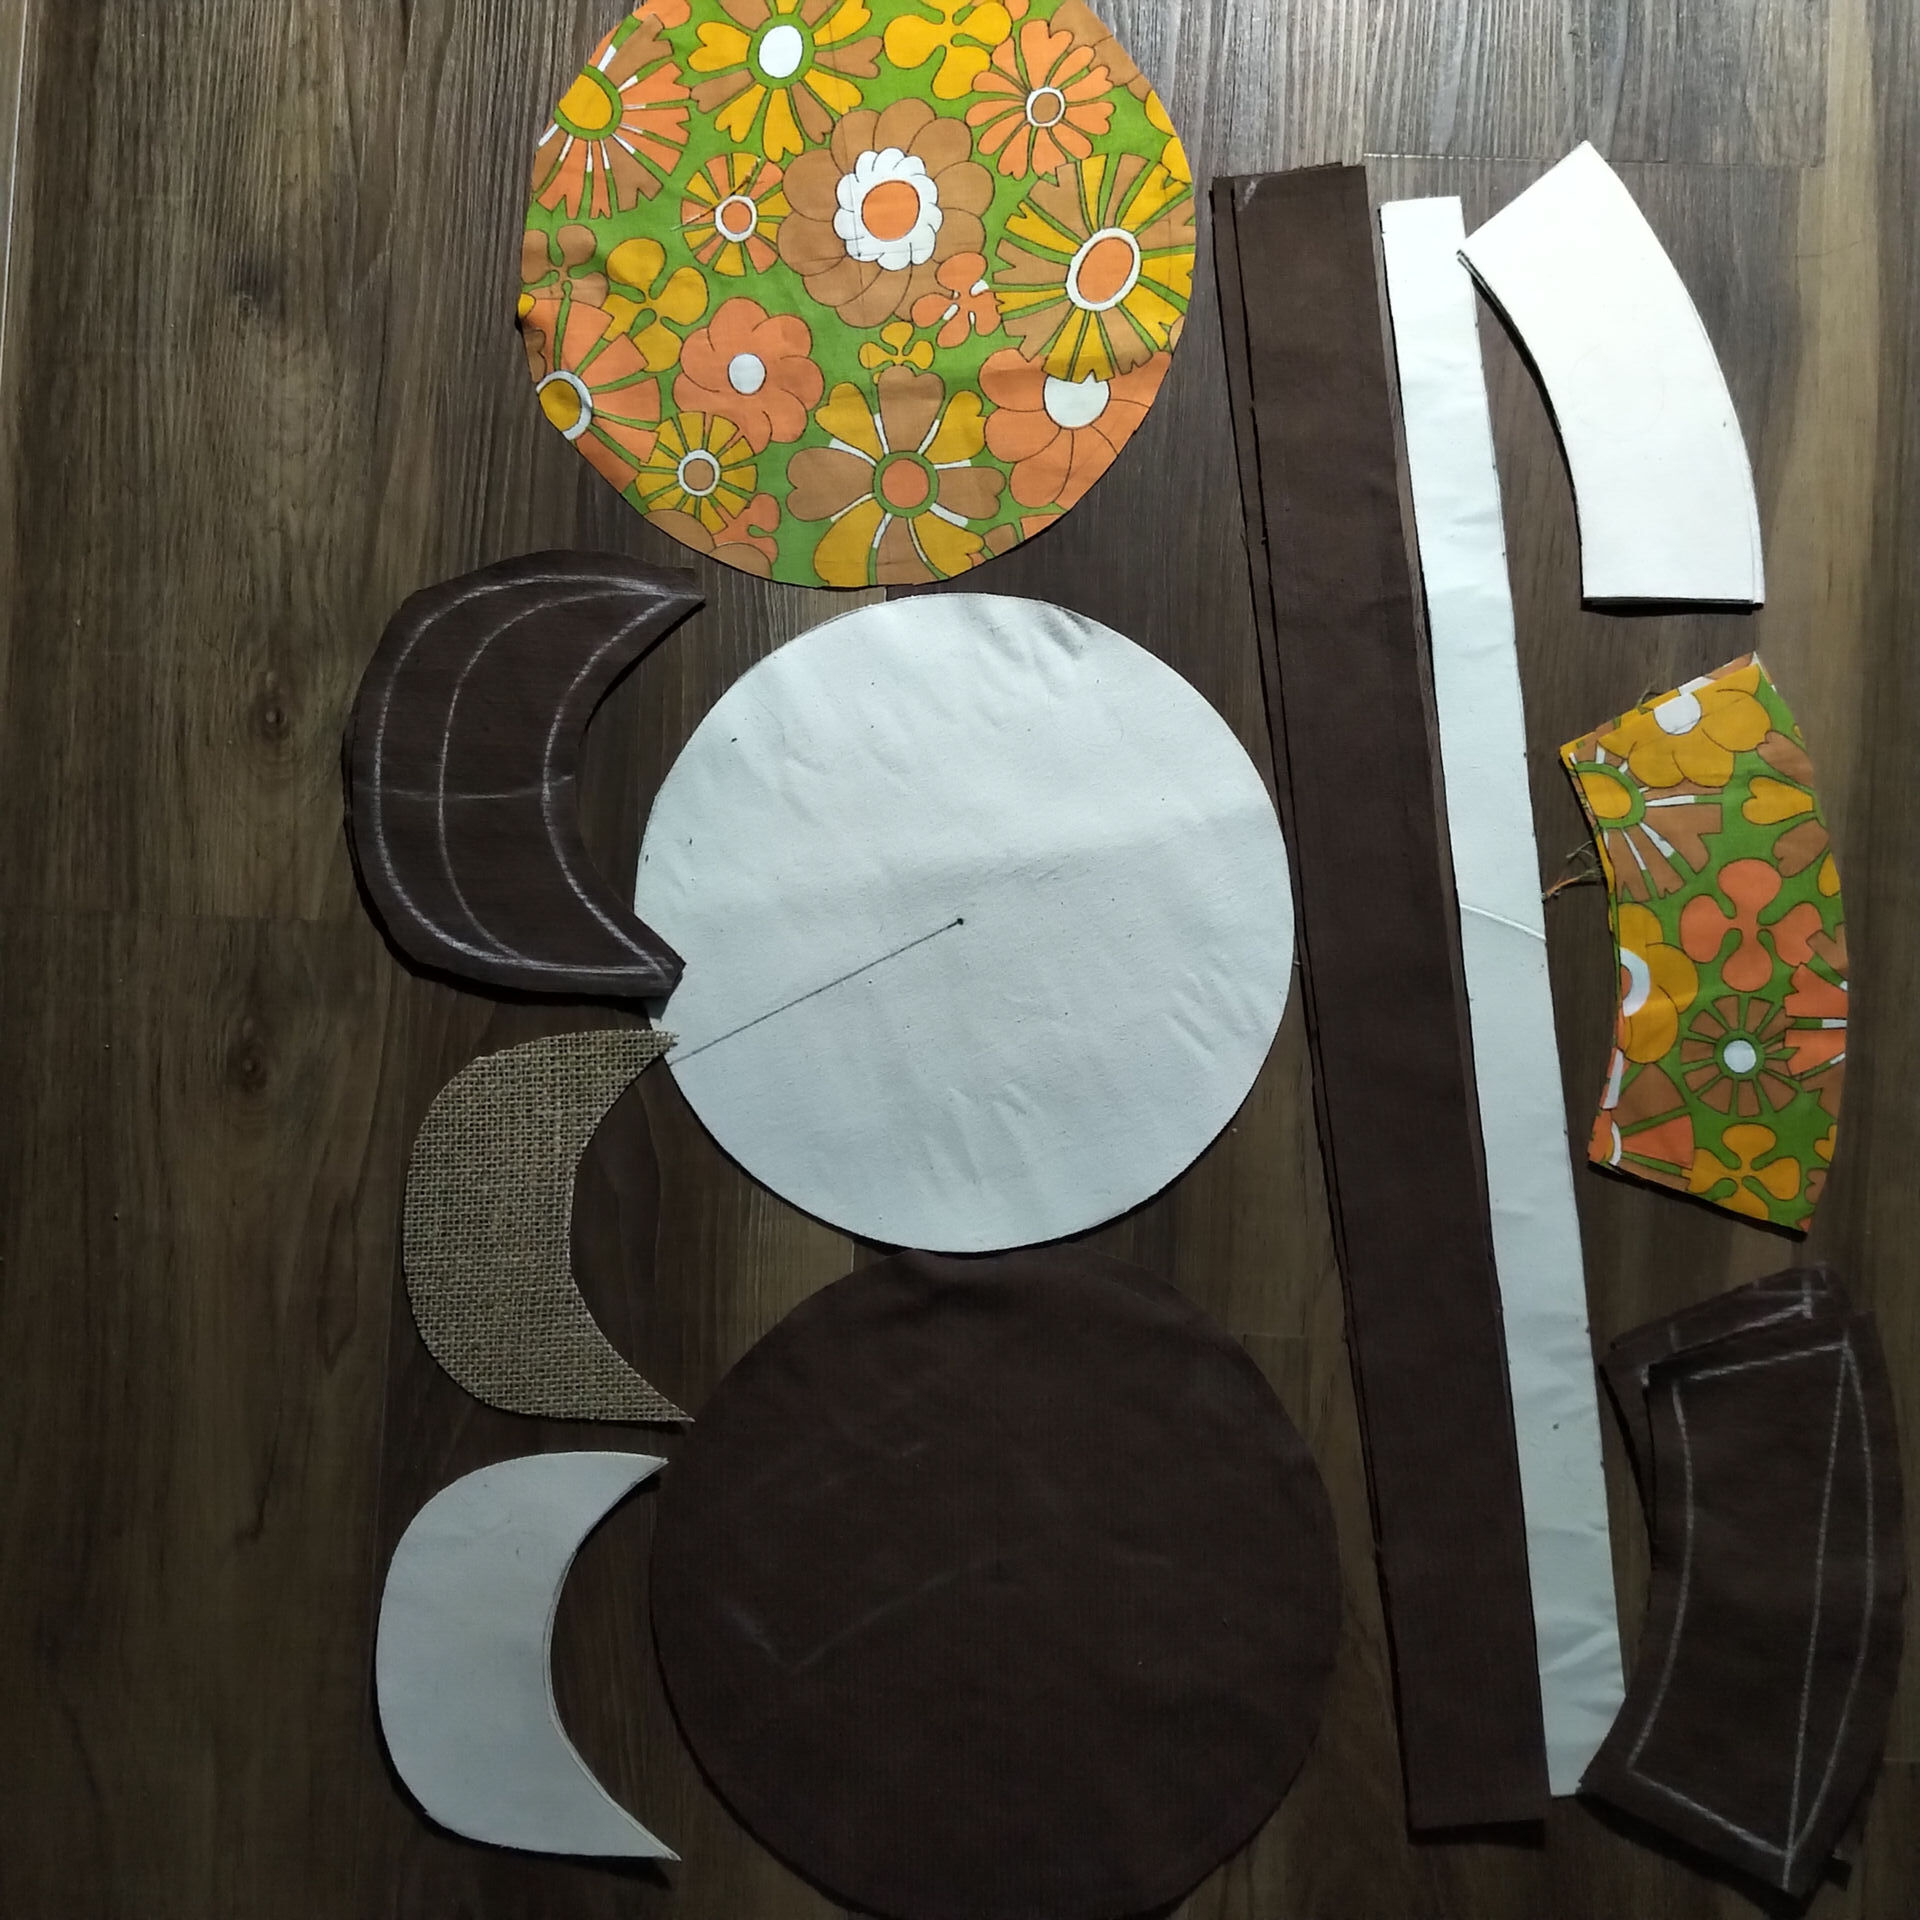
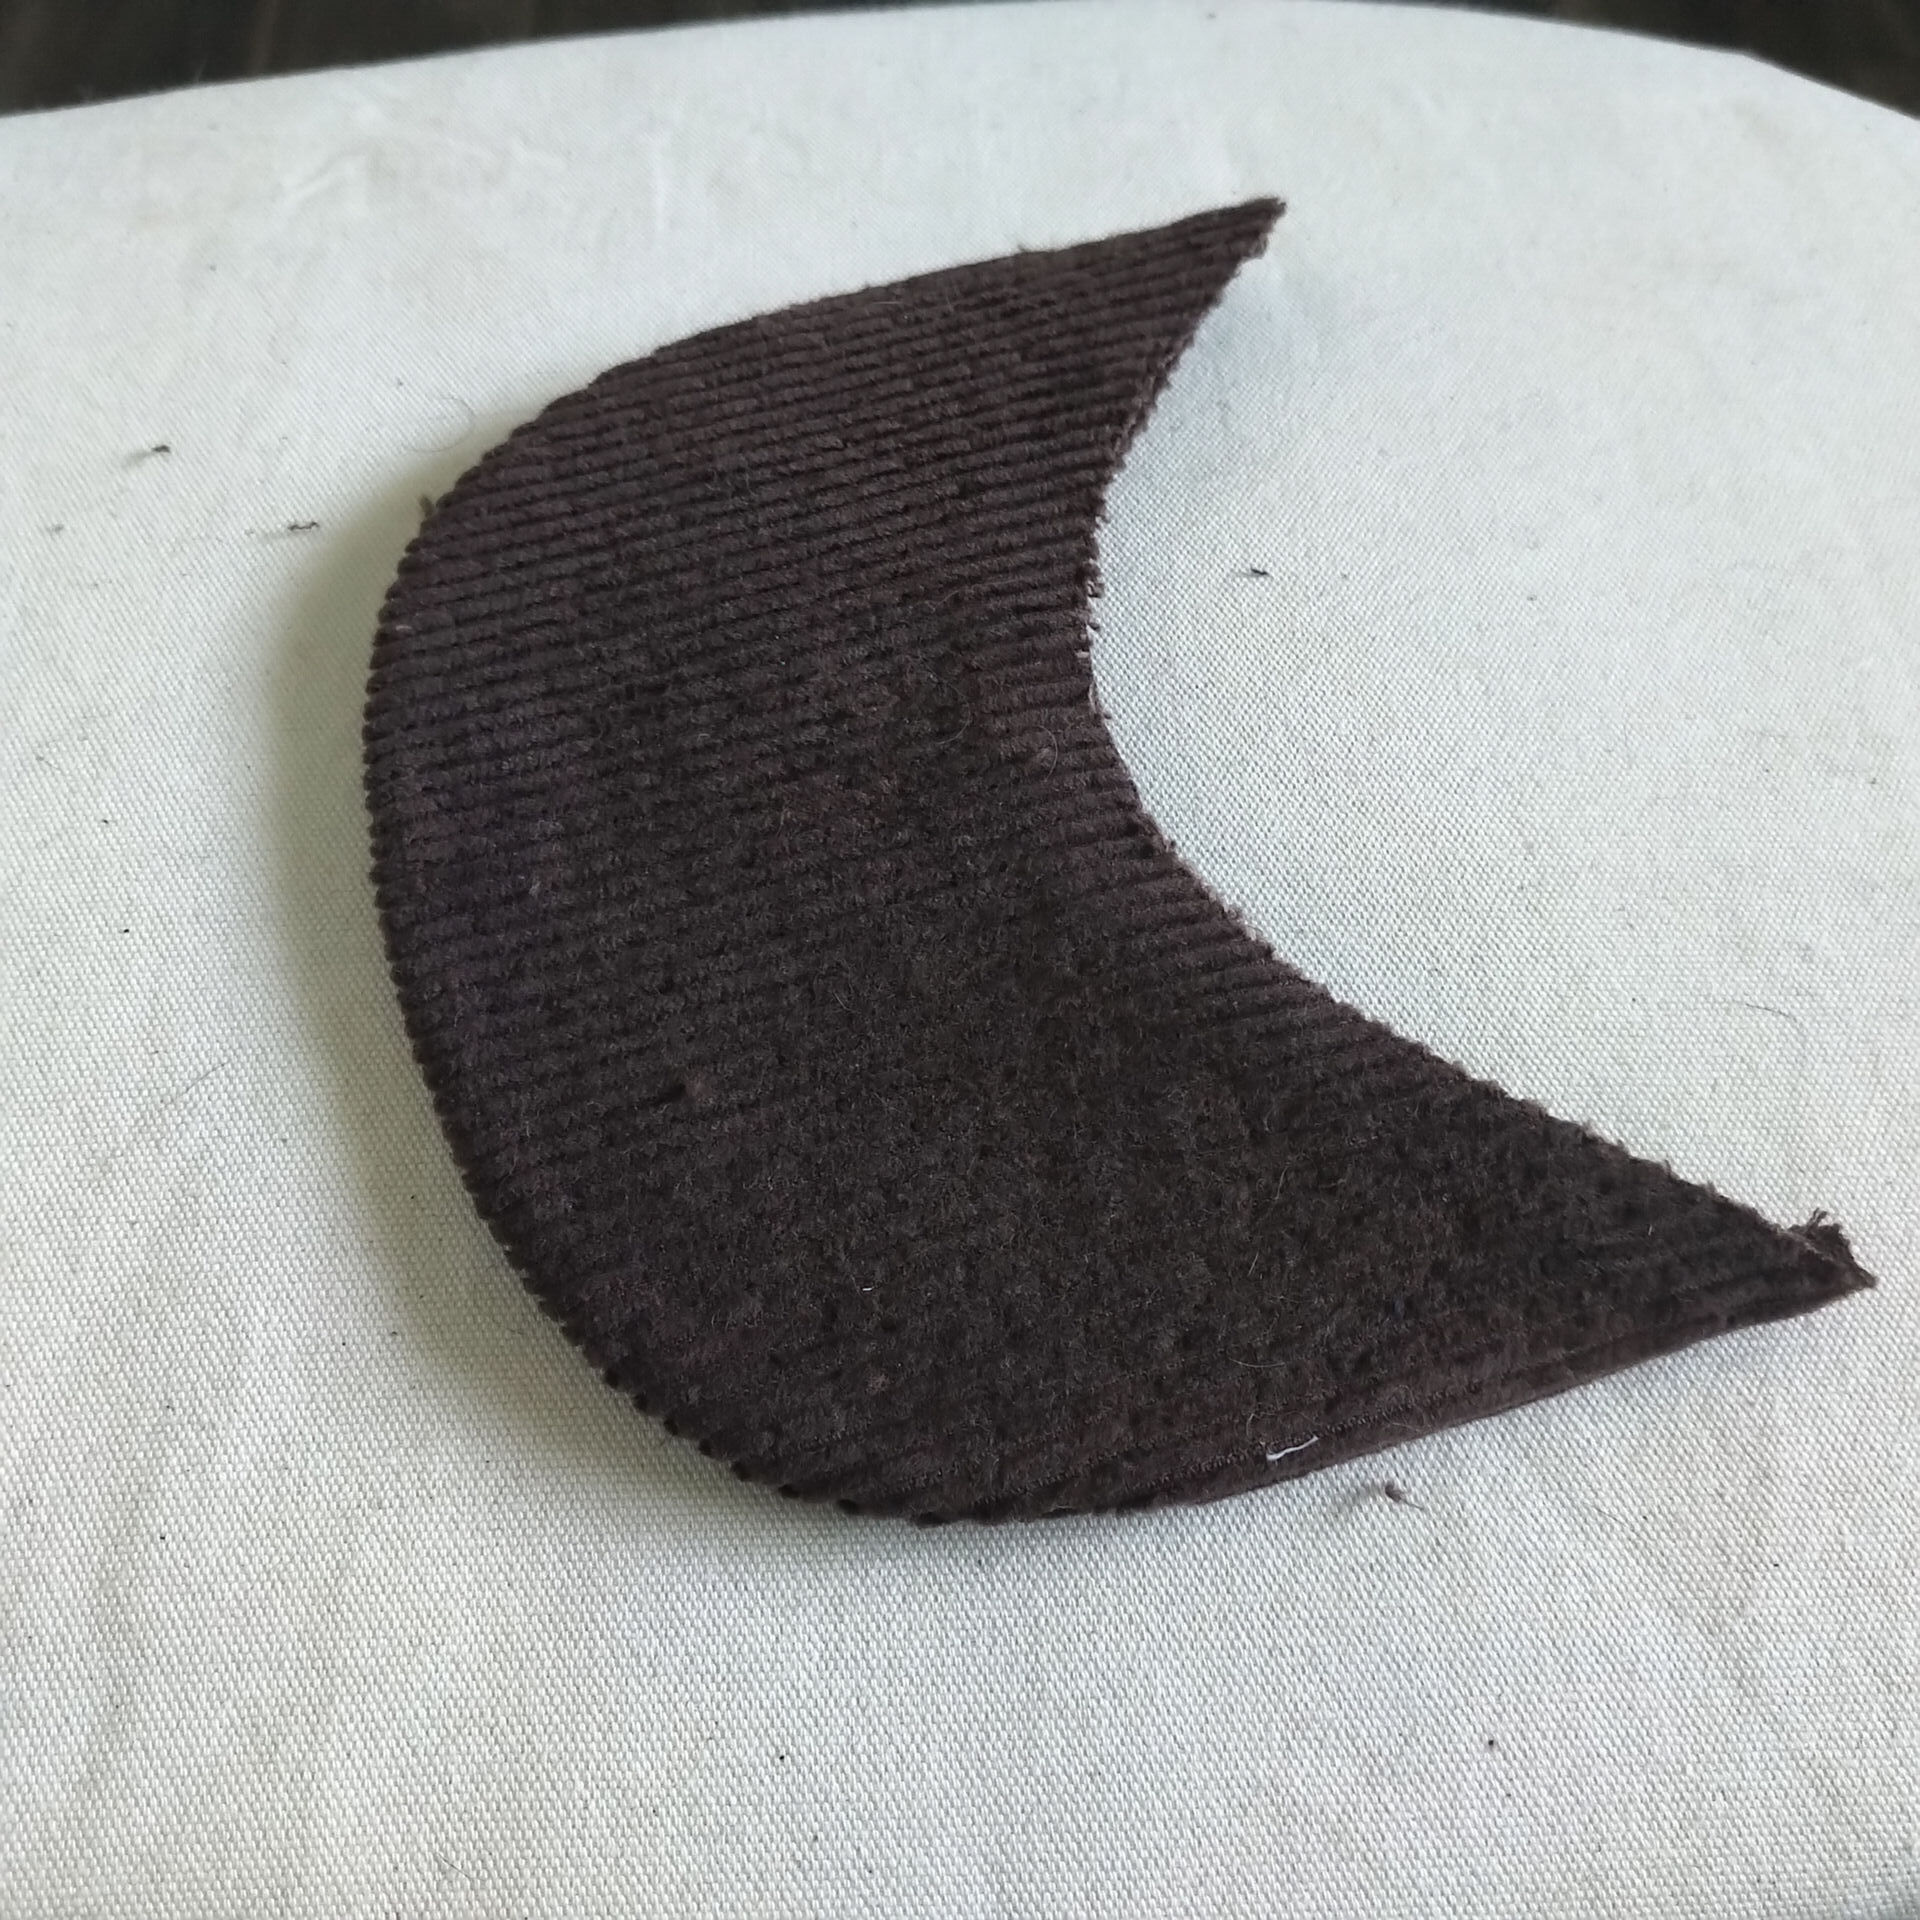
Cut out the required pieces from your fabric:
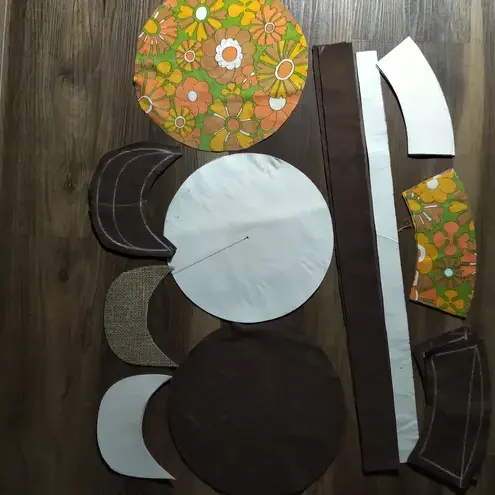
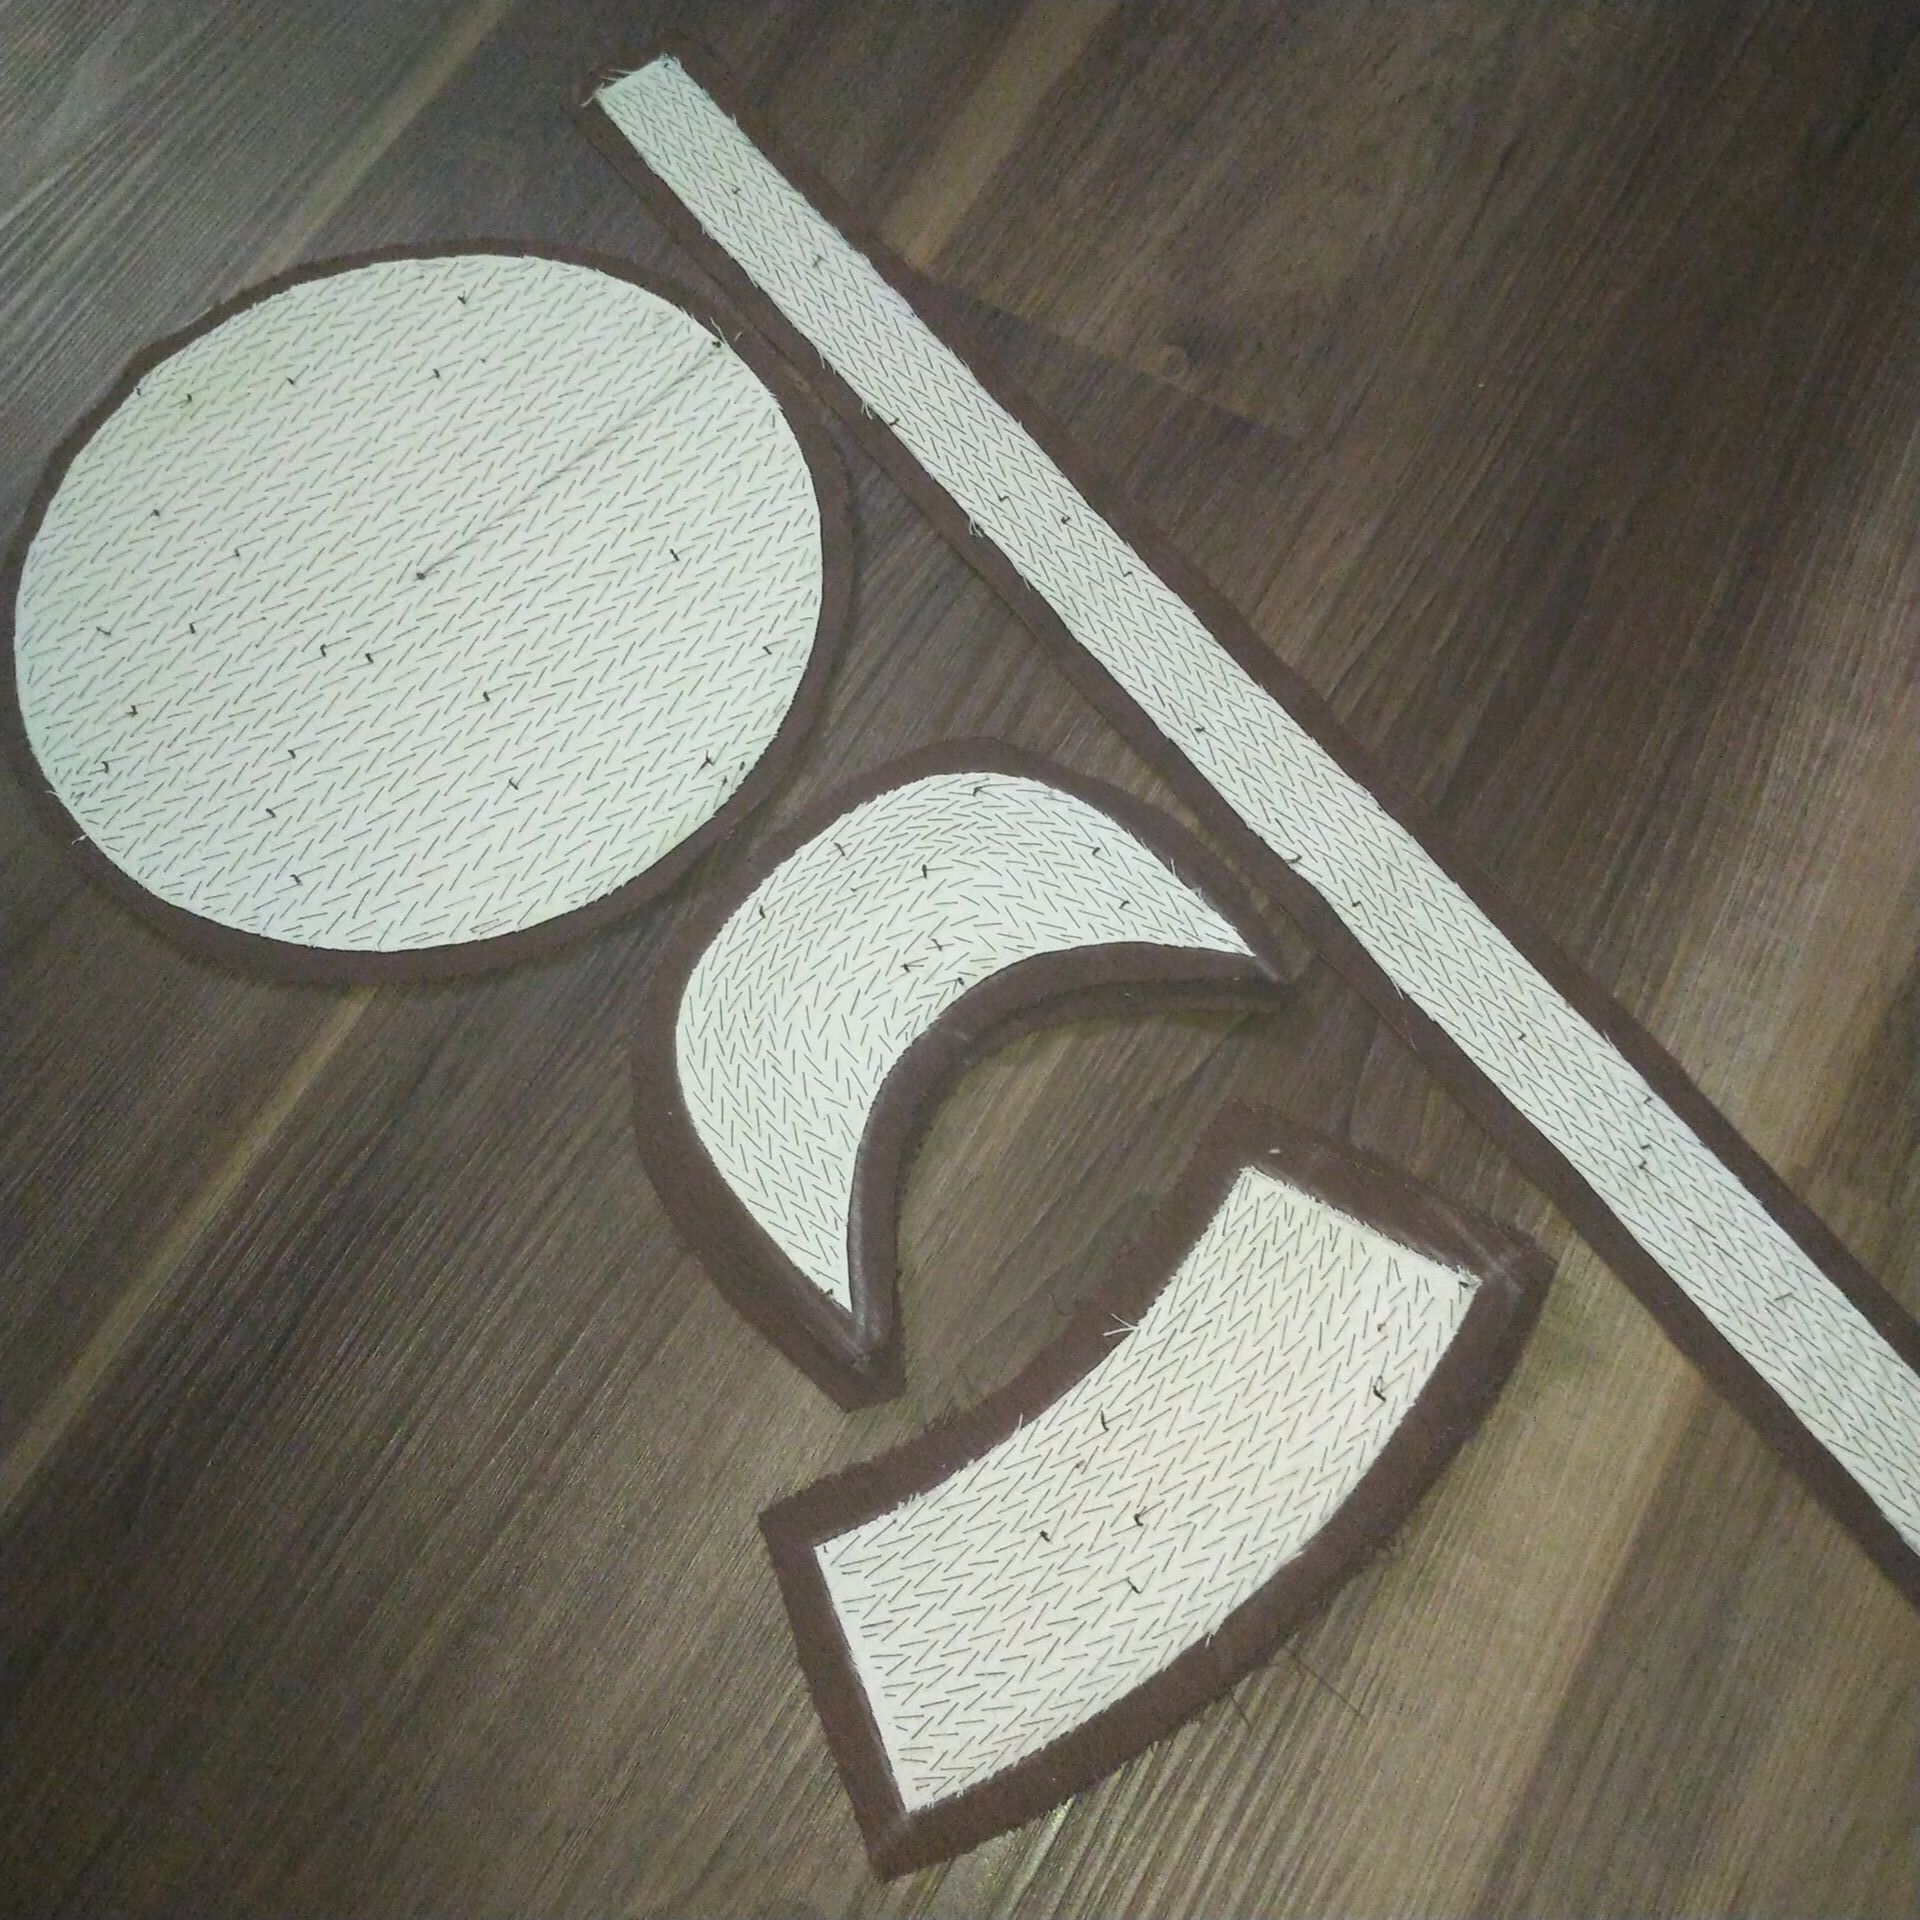
Figure 2: Cut out pattern pieces. Pad stitch the interfacing pieces to the corresponding main fabric pieces. If you’re using fusible interfacing instead this is where you’d fuse the interfacing to the main fabric.

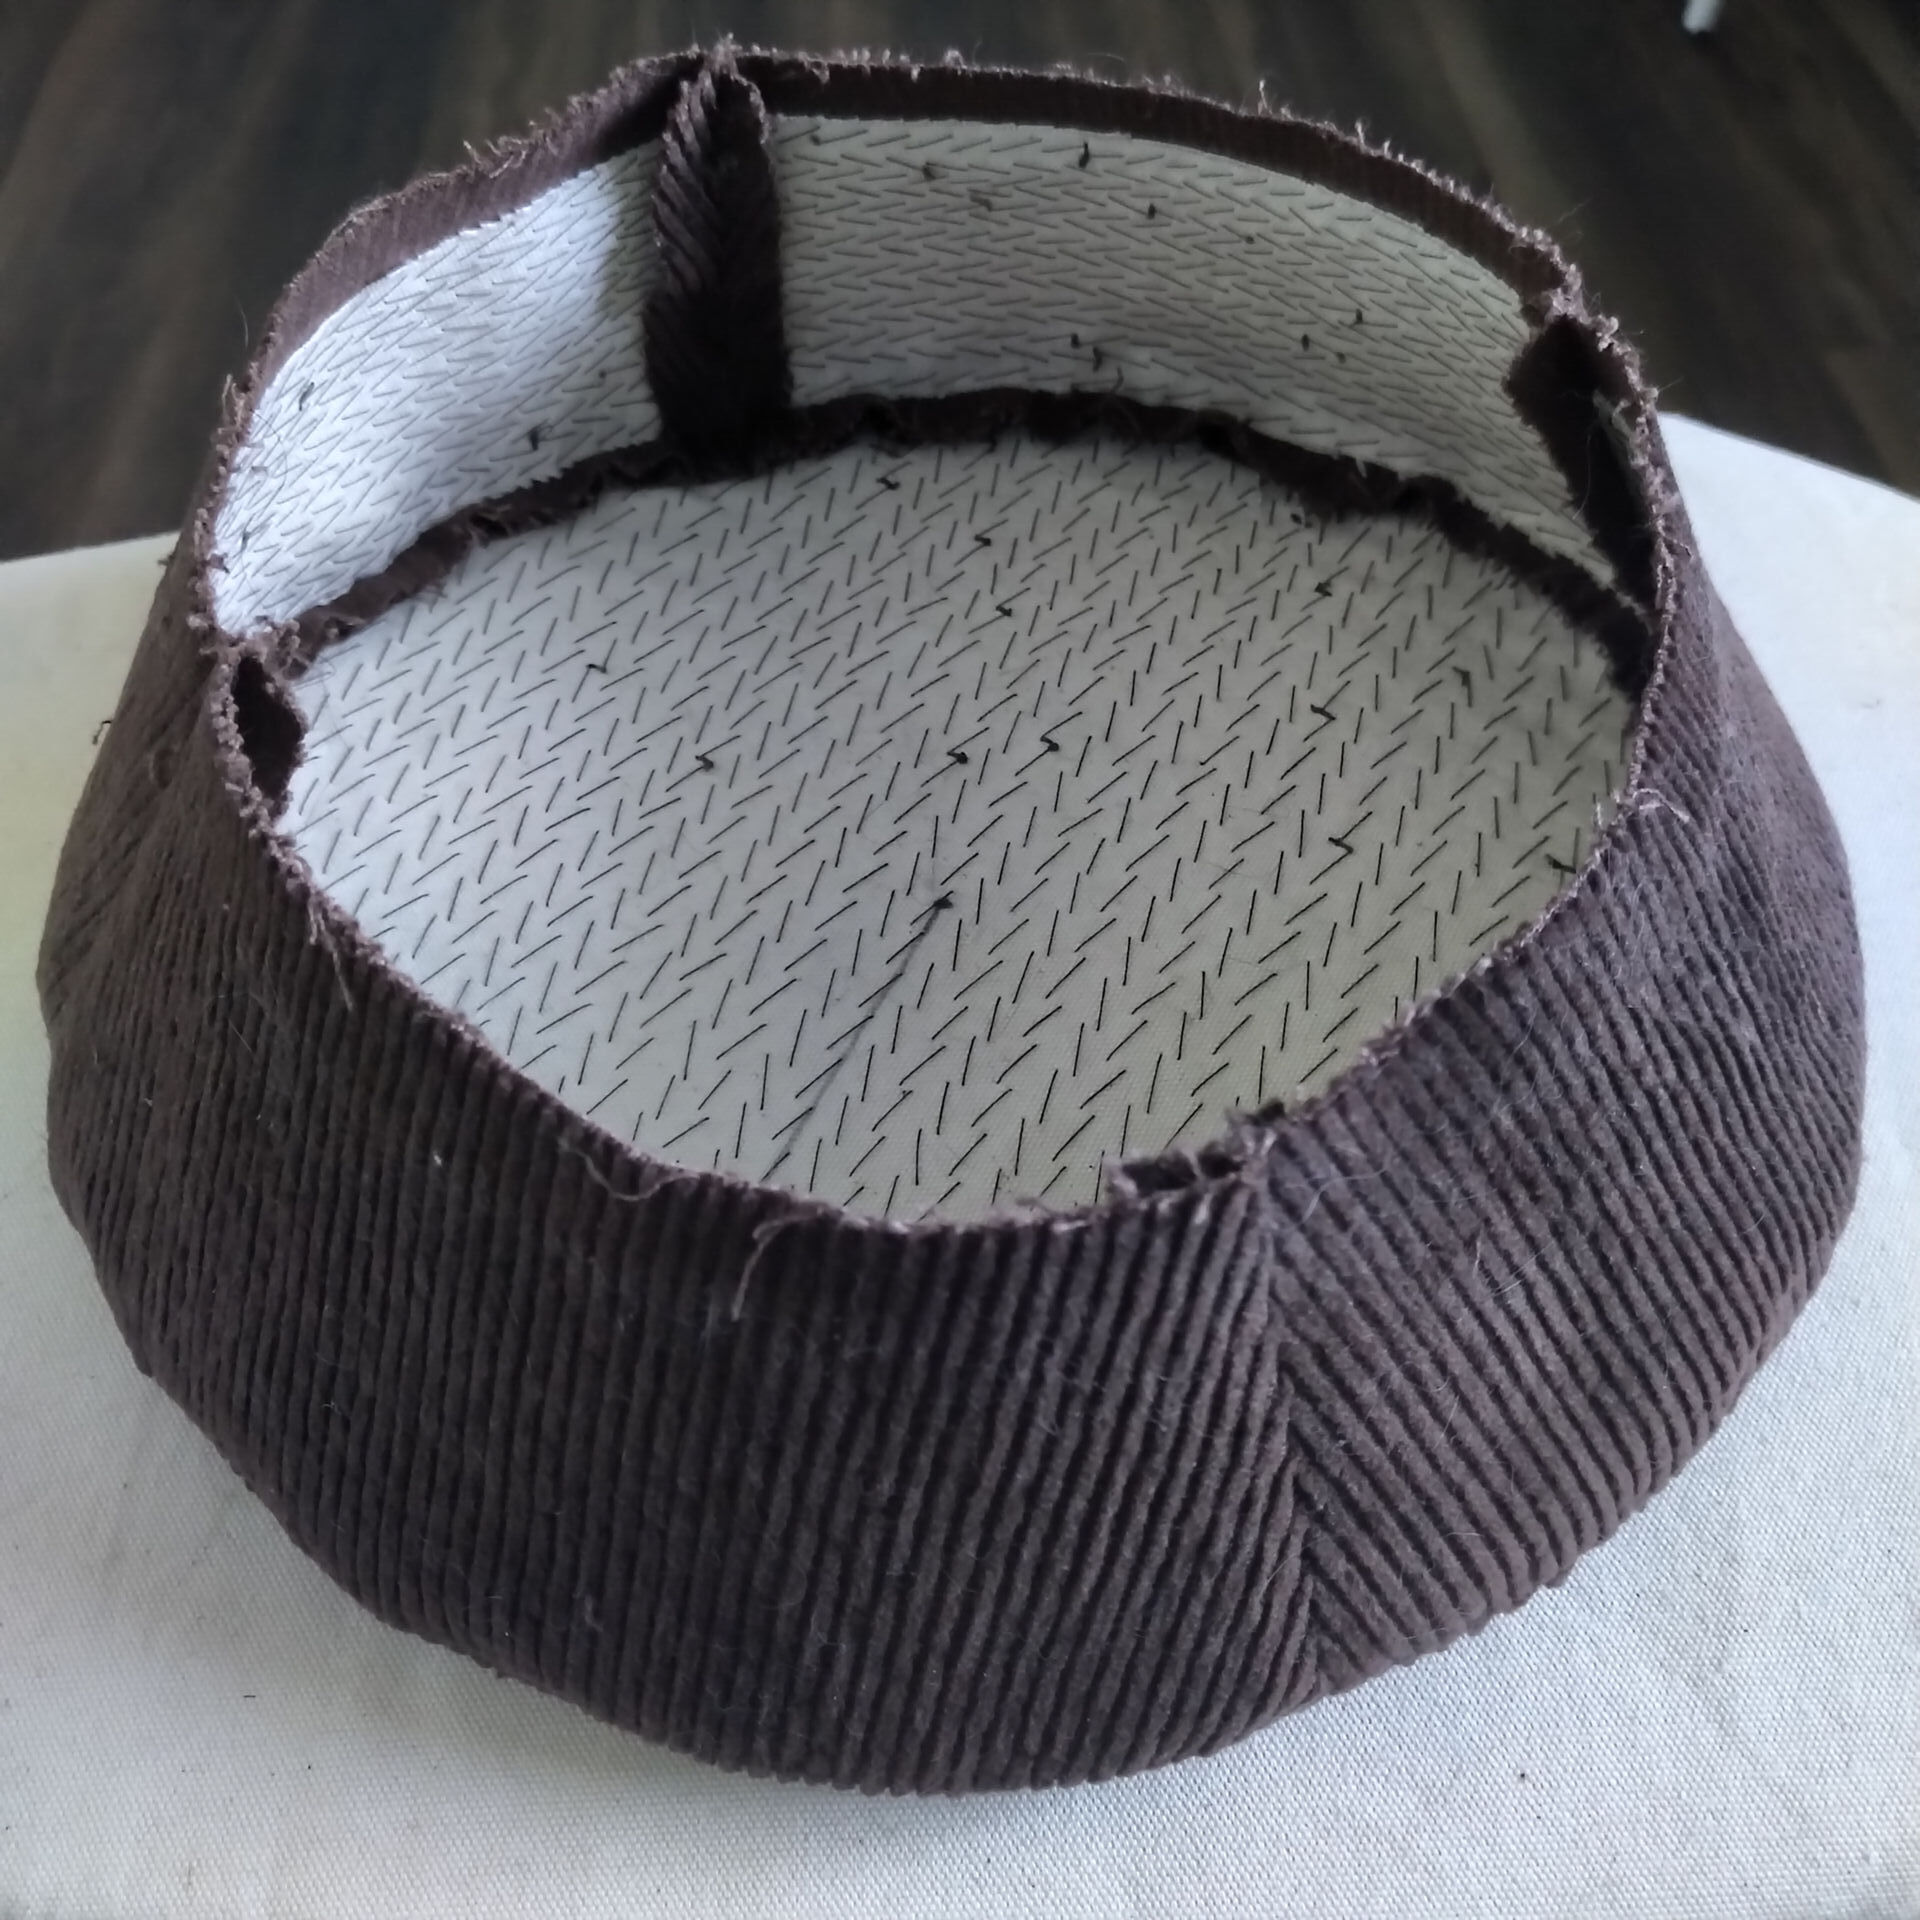
Figure 3: Main fabric pieces with pad stitched interfacing. Right sides together, sew the four side pieces together then press seams. Repeat for side interfacing pieces.

Figure 4: The sides shown right side out. Right sides together, pin the crown to the top of the sides. Stitch and finish the seam, personally I finished the seam by felling the seam allowance to the crown. Turn right side out. Repeat for the interfacing pieces omitting turning right side out.

Figure 5: Top of the cap shown right side out. Sew the bill pieces right sides together. Clip edges and turn right side out. Insert the bill stiffener.
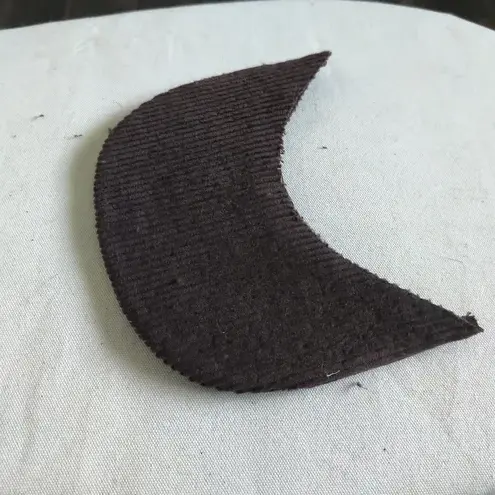
Figure 6: The first bill I made. Align the centre of the bill with the centre of the headband, pin right sides together and baste the bill to the headband pieces. Pin the headband together and stitch the bottom edge.

Figure 7: Bill stitched to the bottom edge of hatband. - Match ends of the headband right sides together and stitch to form a circle. Turn right side out and press.
- Place the lining inside the cap and baste seam allowance wrong sides together.
- Turn the cap top inside out and pin the headband lining to the cap. Lining pieces right sides together. Stitch headband lining to cap top. Note that you should be stitching three layers together: headband lining, side lining, and cap sides. Turn right side out and press.
- Press top seam allowance of the headband to the wrong side. Whip stitch headband to right side of cap top.
Pop the hat on your head and enjoy your new look because you're all done.
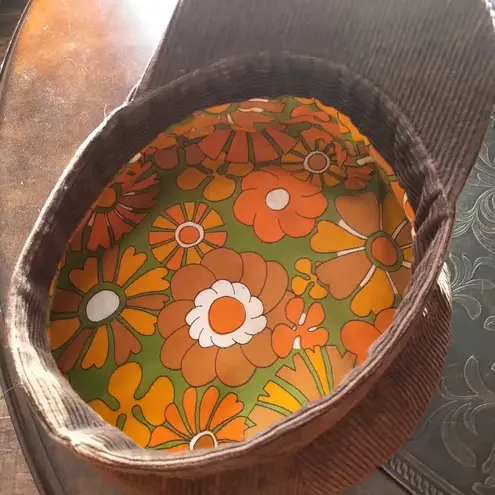
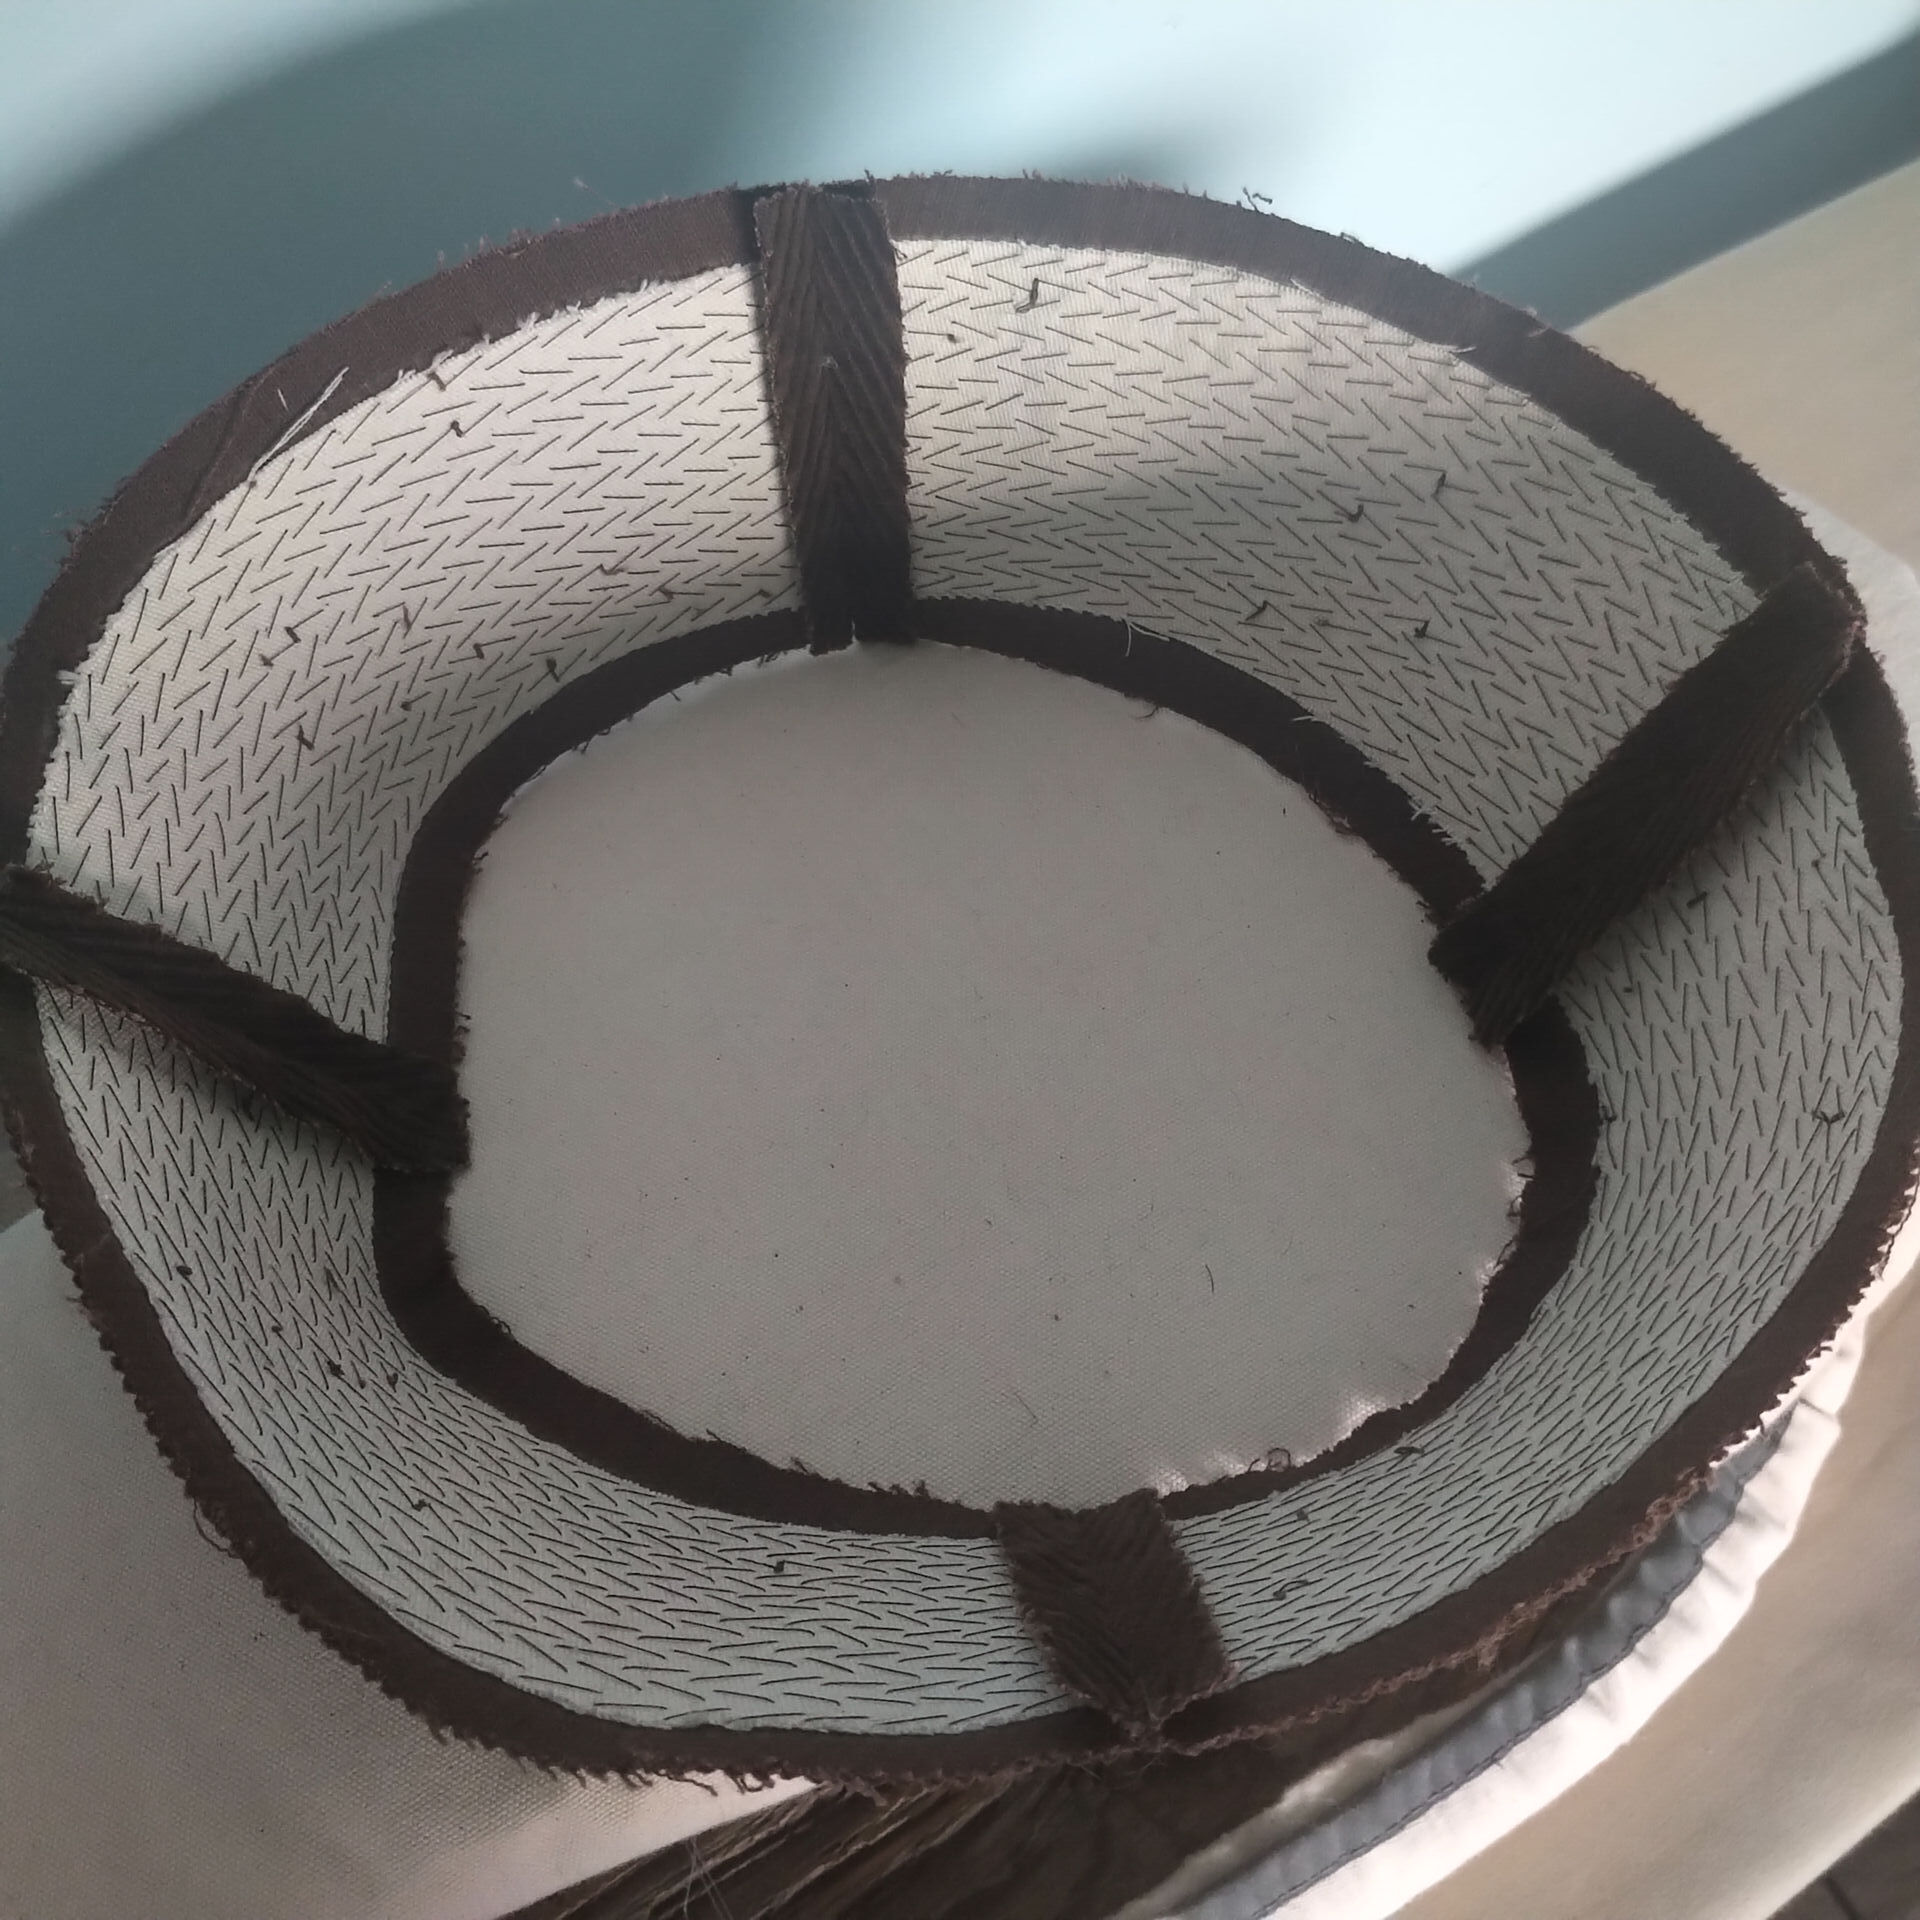
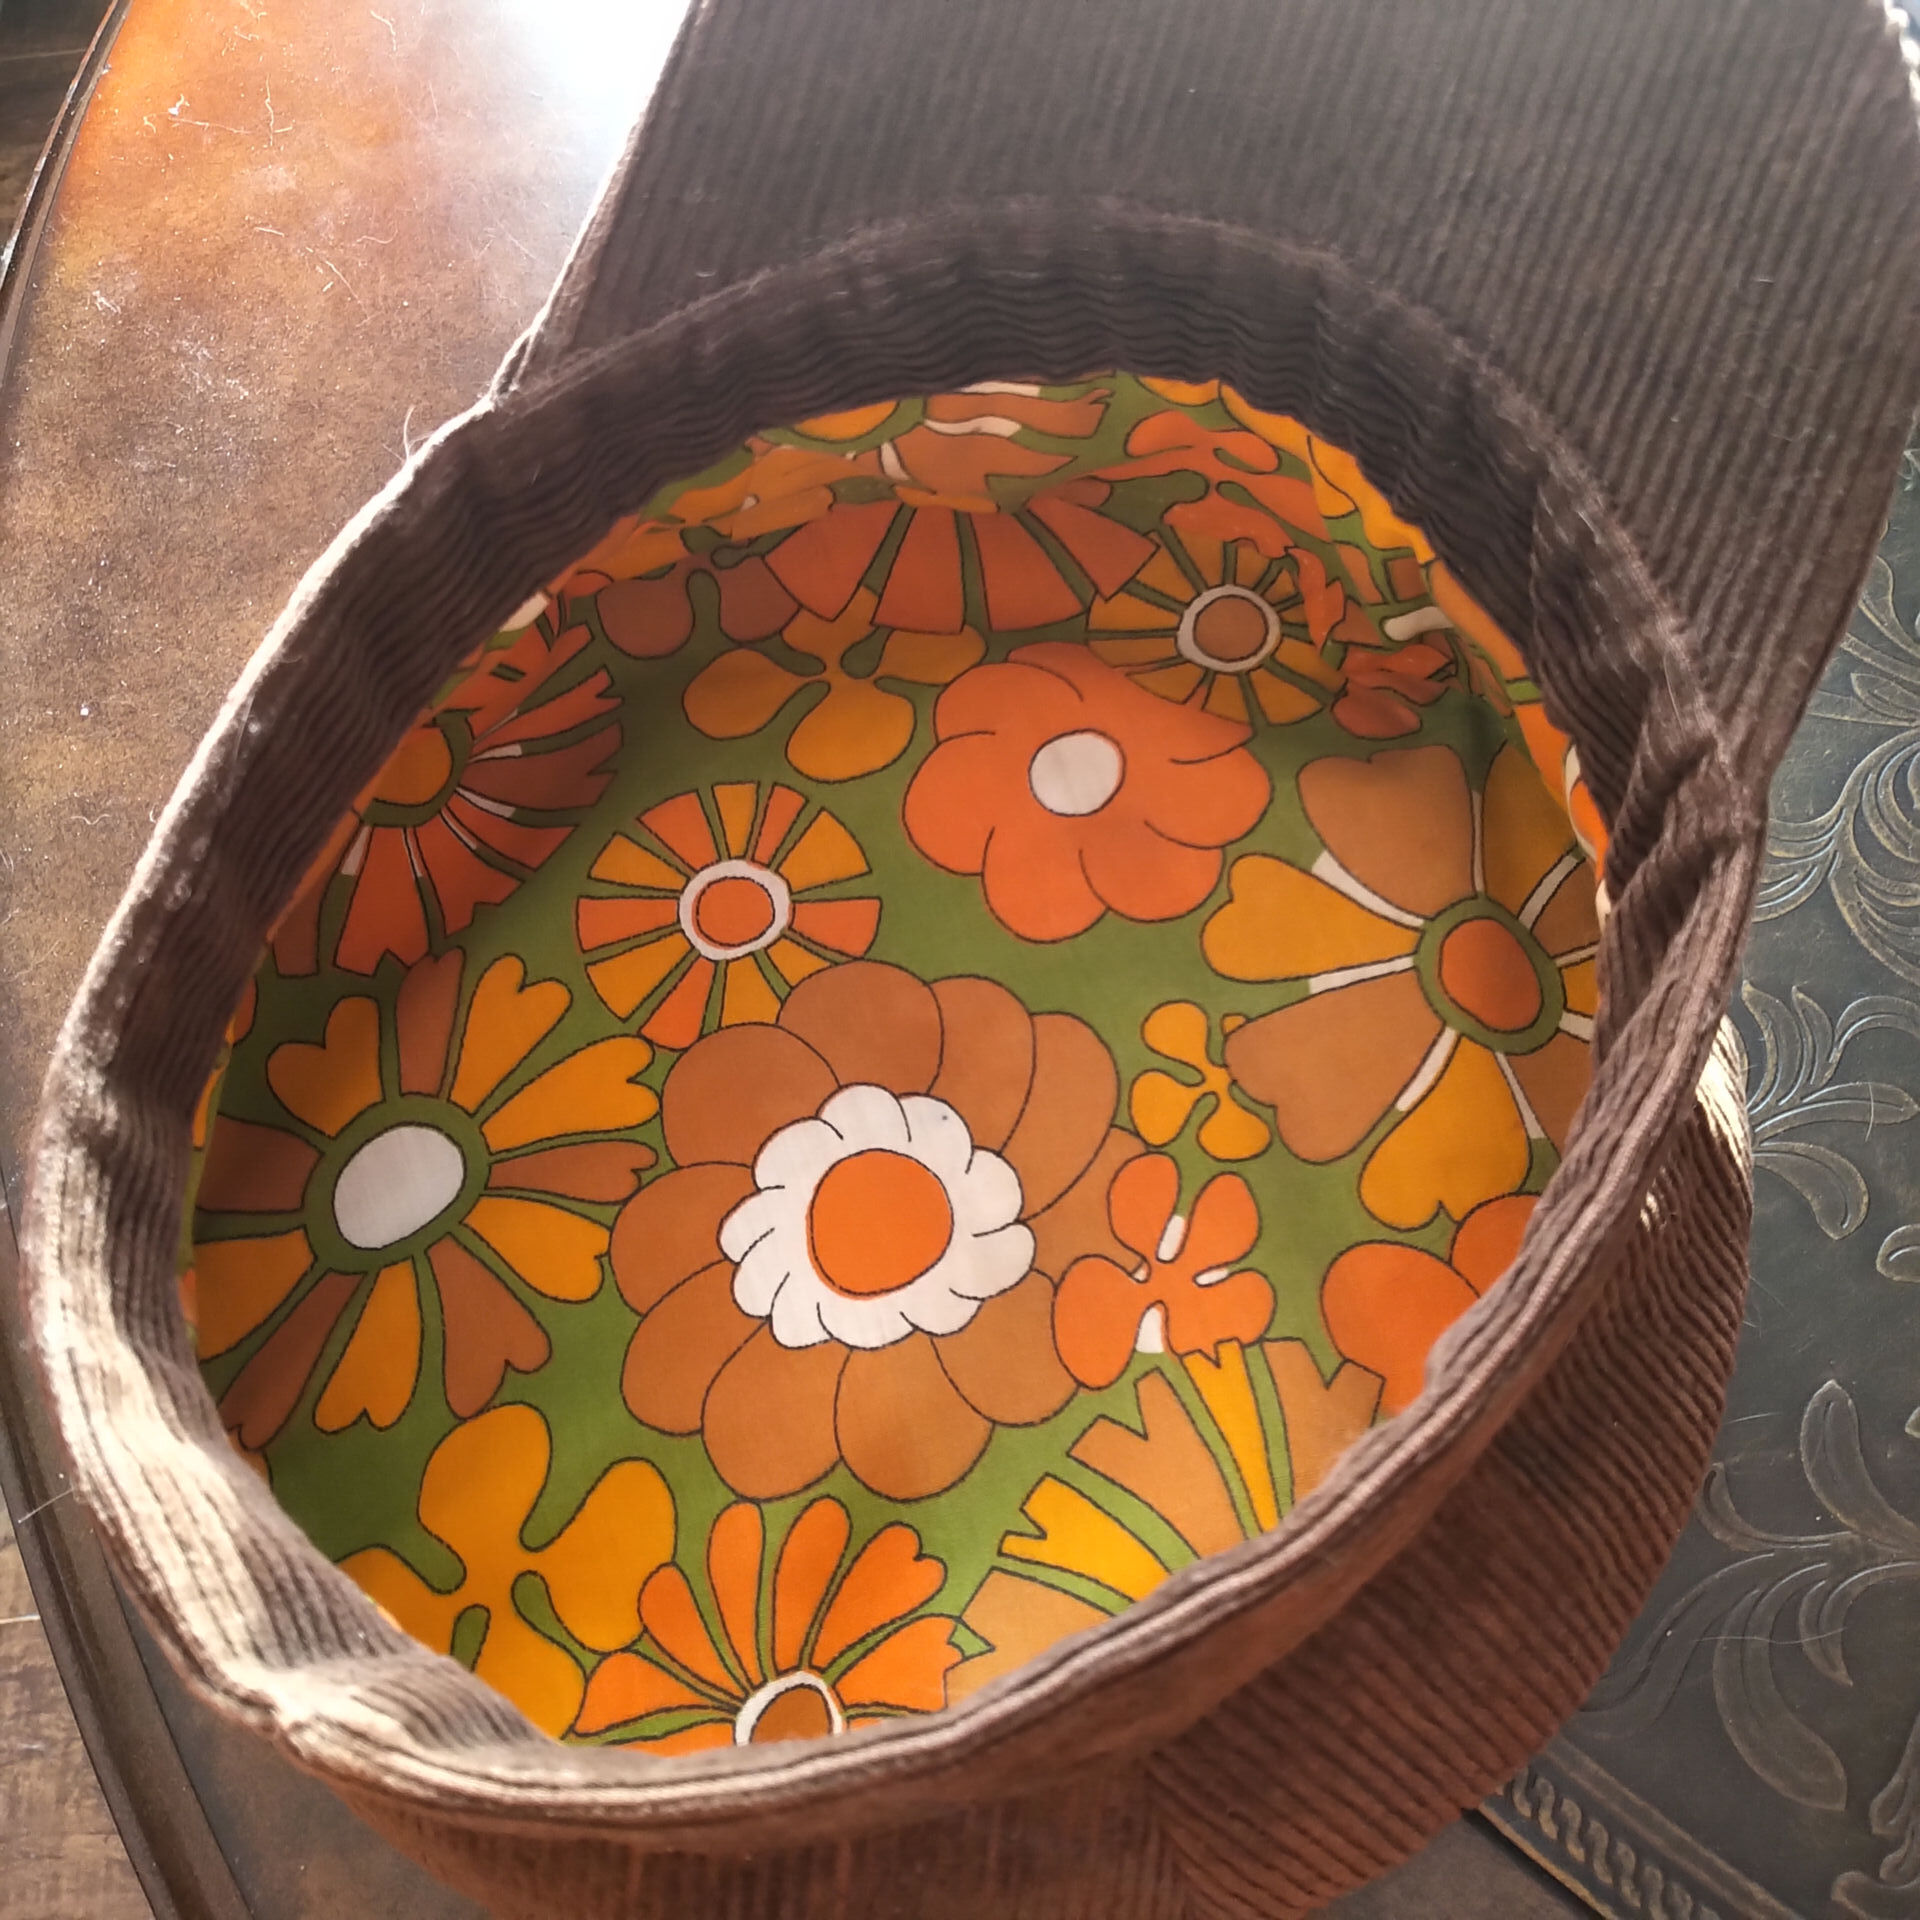
Figure 8: Inside of the completed cap. 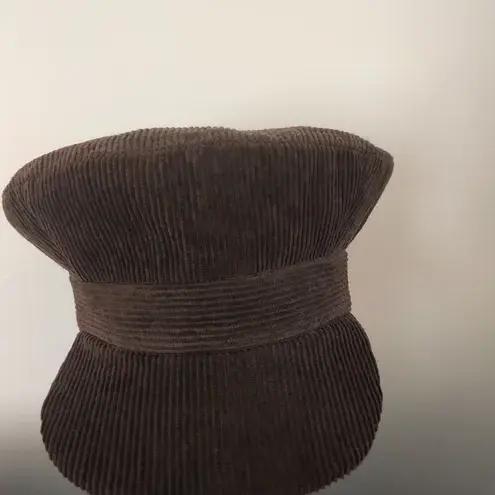
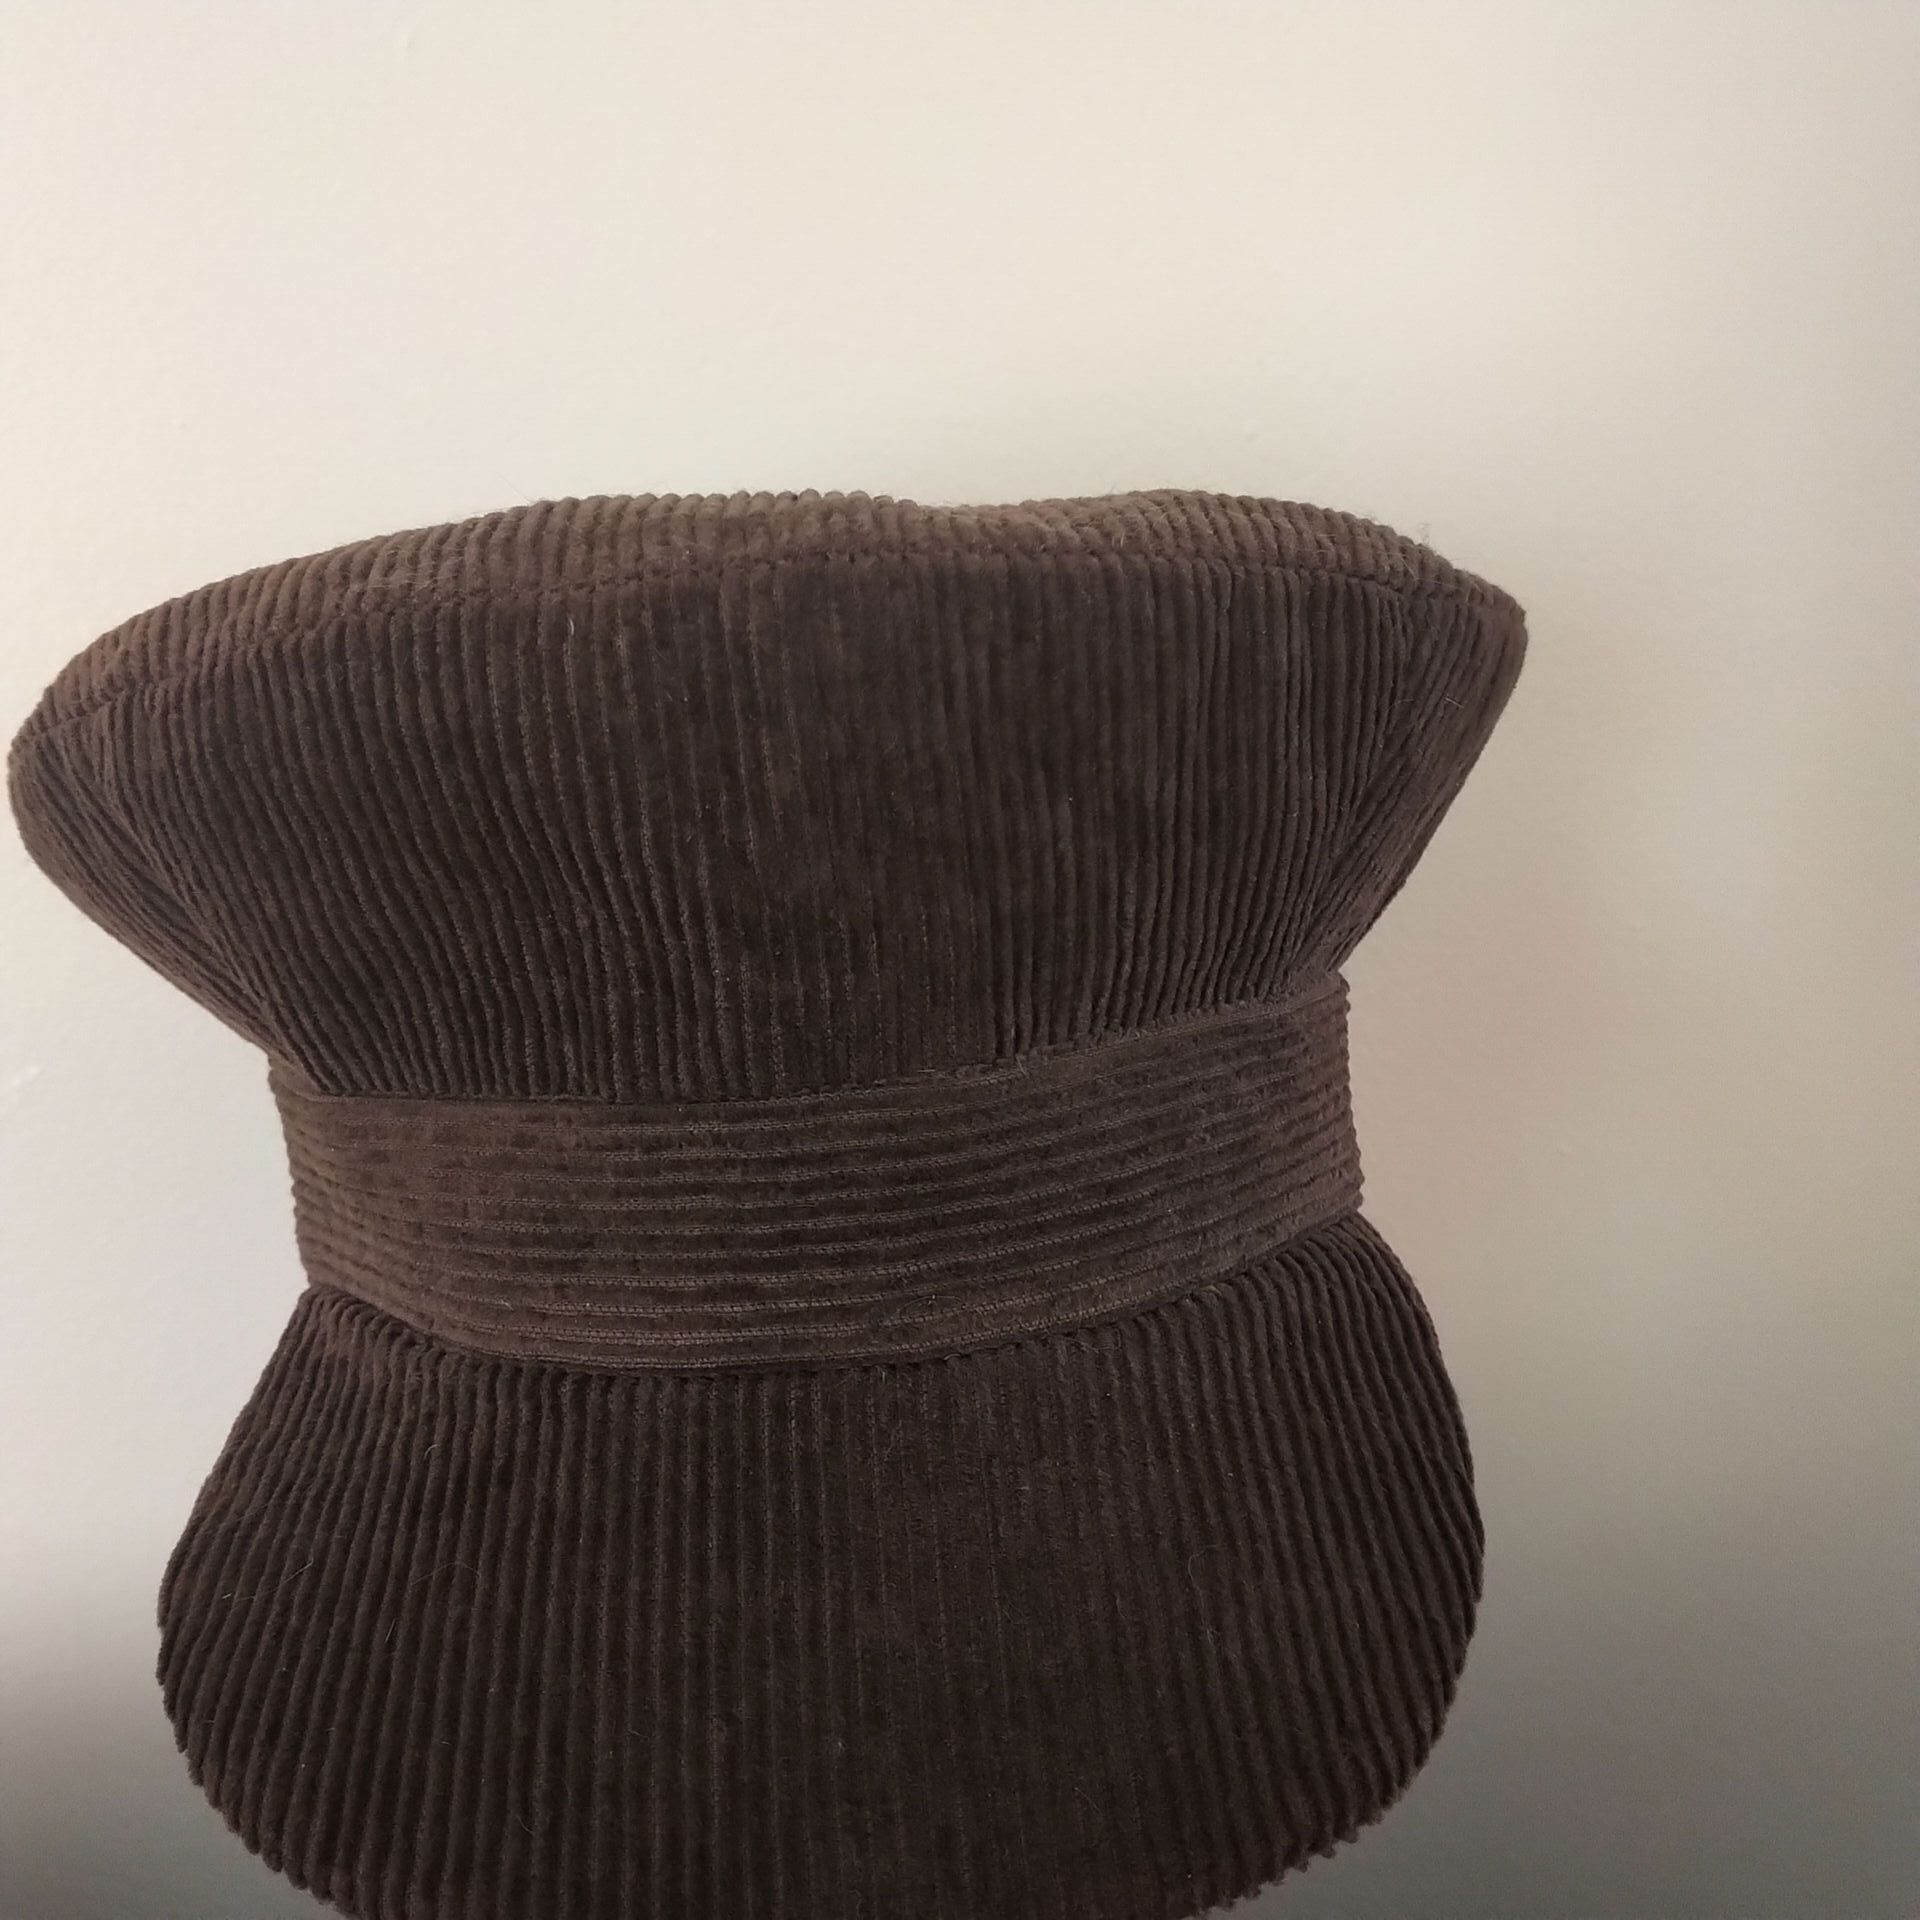
Figure 9: Front view of the completed cap.